
As I might have mentioned I love my old MSR Hubba NX very much. It was the last of the Good Hubbas, before they started screwing up the seams and making it into an Elixir with an uglier fly, and I got it on clearance. It’s been with me on the Chilkoot, Skyline, the Rockwall, and many other one- and two-night trips. It’s still in pretty good shape, give-or-take a hole in the bug netting, and I’m looking forward to bringing it on the South Boundary.
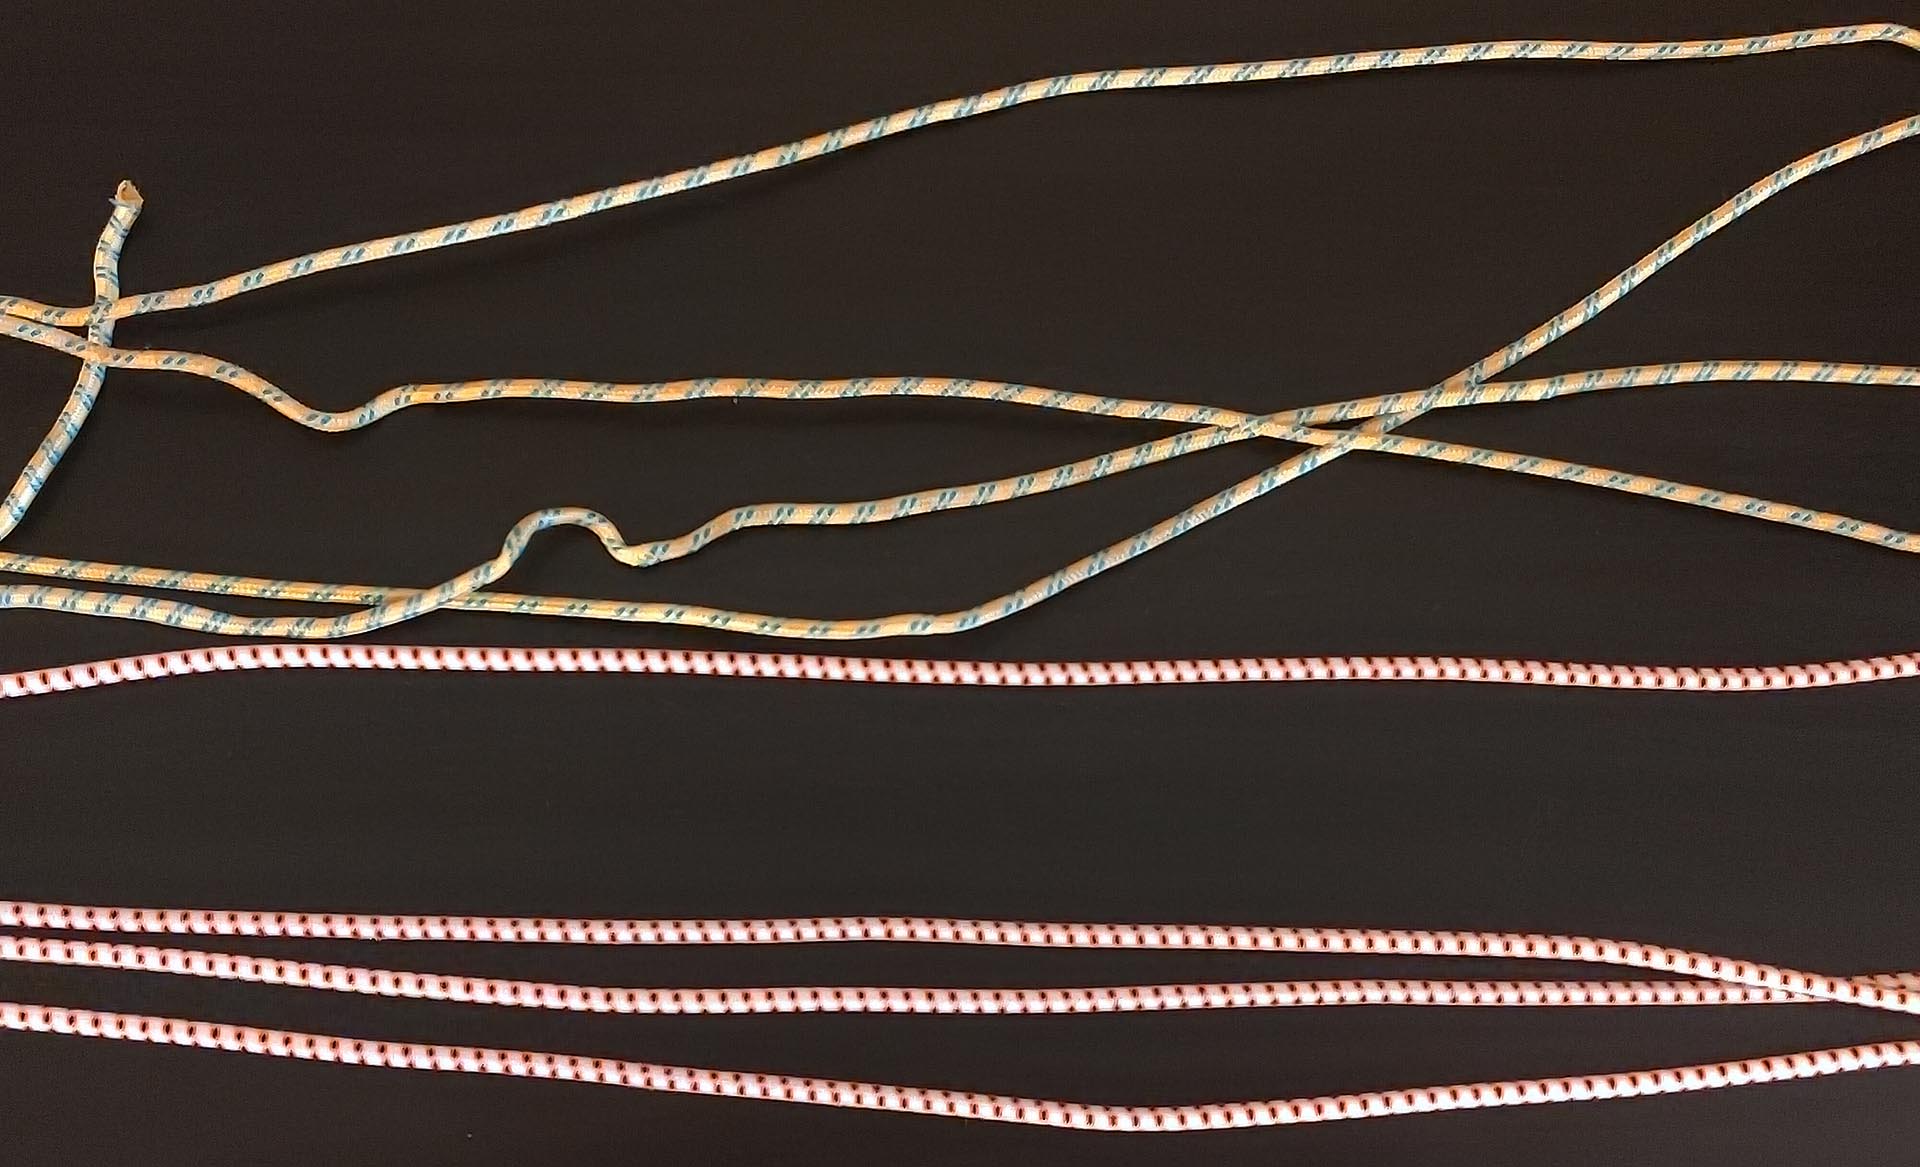
The only problem’s been the cord that connects the tent poles which, after a couple seasons of use, lost its elasticity, leading to slack lines and difficult pole assembly. I got rather good at working around this, but clearly an elastic tent cord with no elastic was a failure waiting to happen. I knew I’d have to replace the cord, but that involved open-heart surgery on a tent that was pretty much working and I kept putting it off and putting it off, until I went camping in July and got fed up. Then I went home and replaced the cords, and not only was it was so easy I felt like an idiot for waiting so long, but I felt better knowing one more thing about how my gear works.
Here’s a guide on replacing tent cord on MSR Hubba-family tents. The principles will help you with many other tents as well, and the most important principle is: don’t be afraid. This is an easy job which not only makes your tent stronger, but helps you know your gear in case anything happens in the field.
Tent pole shock cord is available pretty much everywhere. MEC sells it in a couple different diameters; before ordering, check the diameter of your existing cord real quick since a cord that’s too thick for the poles will have a lot of trouble when it comes time to tie knots. I ordered the MSR-brand cord for my MSR tent. This was probably a bit of a rip-off, but not nearly as bad a one as bringing my poles in to a repair guy and asking him to do it. It feels like good cord anyway.
Although of course the cord in my old tent was also MSR-branded, and it didn’t last long. What I now think happened was that the pole ends were smashing into the cord at the ends of the bag as I traveled. The pole which runs horizontally across the tent, giving it width, never has ends exposed to the environment, and that cord was in lovely shape. I can see, on closer inspection, little breaks in the old cord where the elastic broke beneath the sheath. In a few other places the sheath’s been pinched so bad that it’s almost worn through as well, and if that had happened in the field it would have been “fun.”
Not sure what to do about this in the future, besides being aware and being careful. At least if it happens again I know what to do.
A YouTube video by Davey’s Dash helped me out though, sadly, this is a rare case where YouTube production value can actually be important: his phone video is too often badly-lit or out-of-frame for me to see the important details. Still, this was a very helpful video and I’m glad it was there. Above all it showed that my Hubba NX is, in this respect, highly maintainable. Once I figured out what I was doing it flew along.
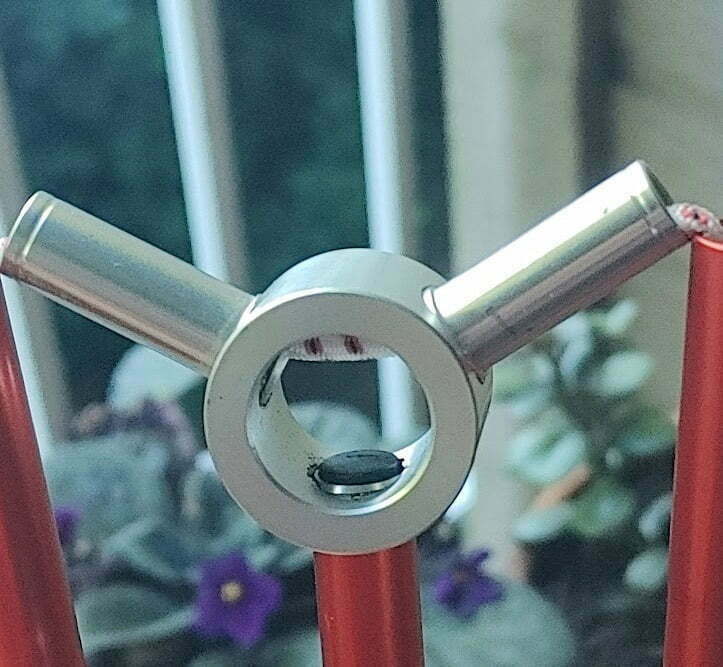
Before beginning, you should be aware of exactly what you’re doing. Each “pole” is one cord, made up of several pole segments (the actual aluminum bits with cord running through them that you join up). Hubs in the middle of the poles, usually plastic, join separate poles up when supported by your tent. For example, the Hubba NX’s poles come in one piece out of the bag, but this consists of a pole on a plastic hub that pushes out the foot of the tent, an identical one on the other side that pushes out the head, a short, slightly curved one that pushes out the top, and the big straight spinal pole. That’s four poles total, and therefore four cord replacement jobs. My MSR Elixir 3, which is a much bigger tent, has two huge poles that span the length of the tent plus one, separate smaller one that goes across the top. So that’s three poles, and therefore three lengths of cord, though more cord in total.
The cord needs to be under some baseline tension, but not too much. There are theories about the best way to do this. MSR recommends stretching out 0.35 times the length of the poles from one side, and six inches from the other, then tying the ends on. This was a faff. What I wound up doing was1:
Recommended tools: permanent marker, tape measure, clamp, scissors or work knife, lighter.
-
Mark the segments of the pole in order, from one to the last, so if you sneeze and scatter a bunch of tent pole around your work area you know how to reassemble it.
-
Remove the old cord from the pole:
-
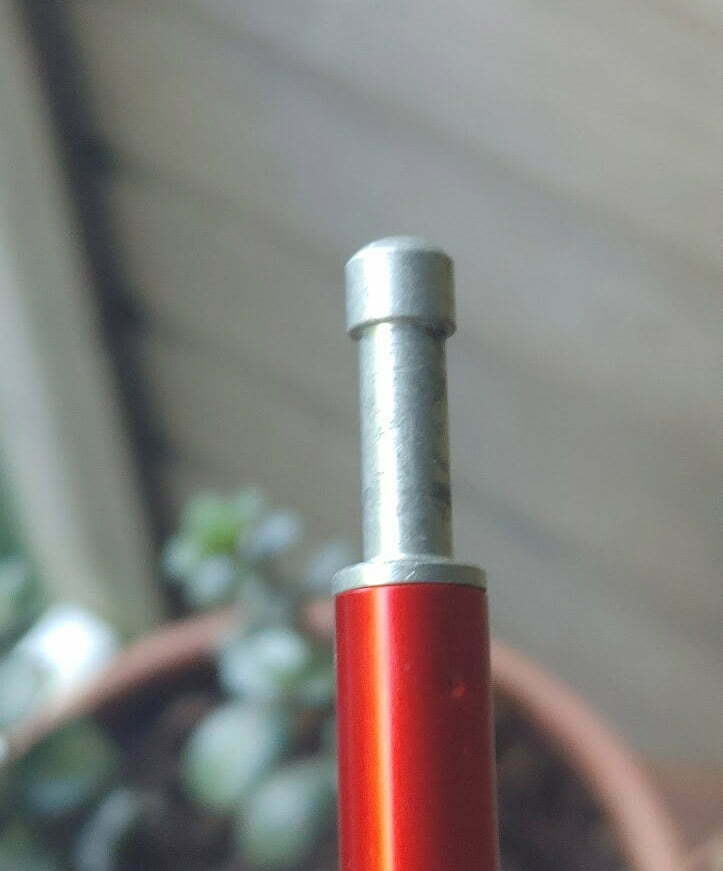
For the shorter poles that go at the bottom of the tent along the foot and the head, as well as the central pole that gives the tent its breadth, unscrew the metal end-caps. Of my four tips, three required only finger-force and an easy half-turn or so. One was on tighter and required very light touch from a pair of pliers. Not much force should be needed in any event. The cord is looped around a clip on the bottom of the cap, and should be trivial to remove or un-tie.
-
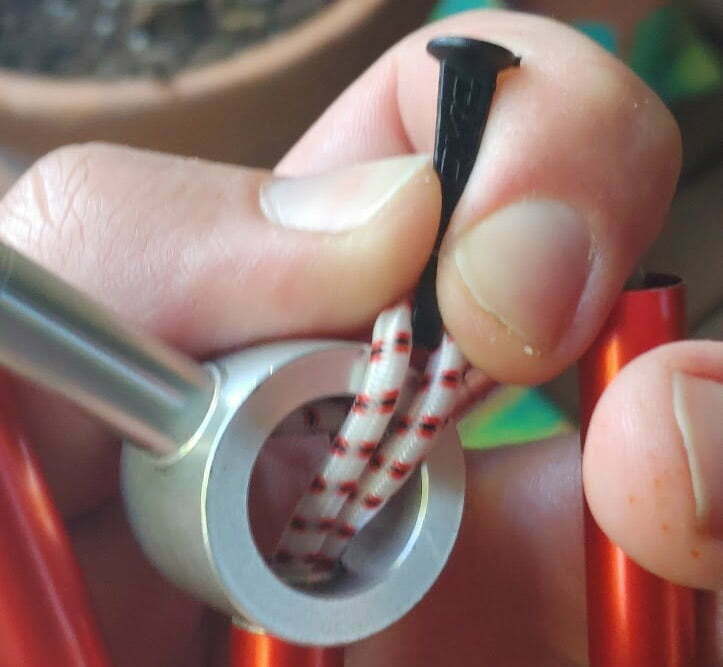
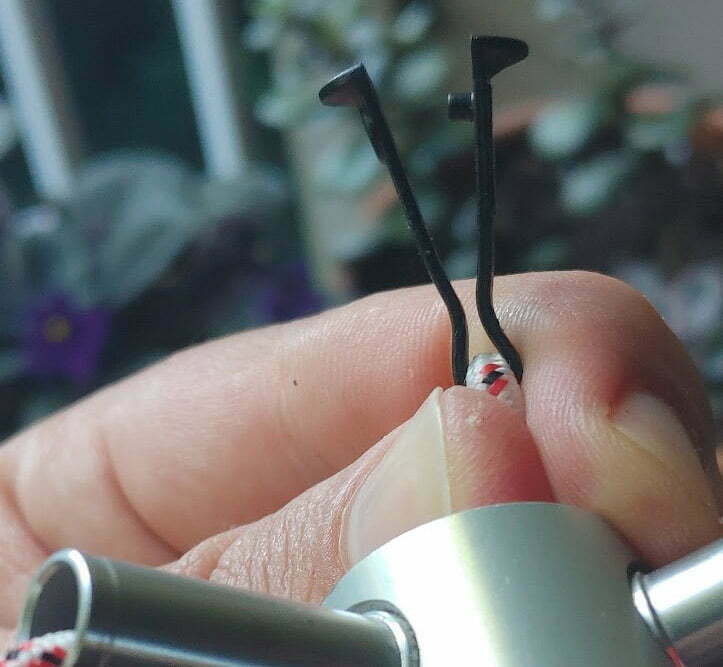
For the spinal pole, push on the slack in the old cord until a small plastic clip, shaped like a nail with a slit down the middle, can be threaded out of the hub. The clip opens at the top and can be prised with a fingernail, allowing removal of the (much longer) loop in the shock cord. I assumed the loop was long for a reason, and left it that way when I put the new cord in.
-
Remove the old cord. I never had to cut, I just untied knots.
-
Remove the other end of the cord from its clip, and leave the clips where you won’t lose them.
-
Thread the new cord in one end, and out the other, of the pole, one segment at a time, making sure to remember any hubs en route.
-
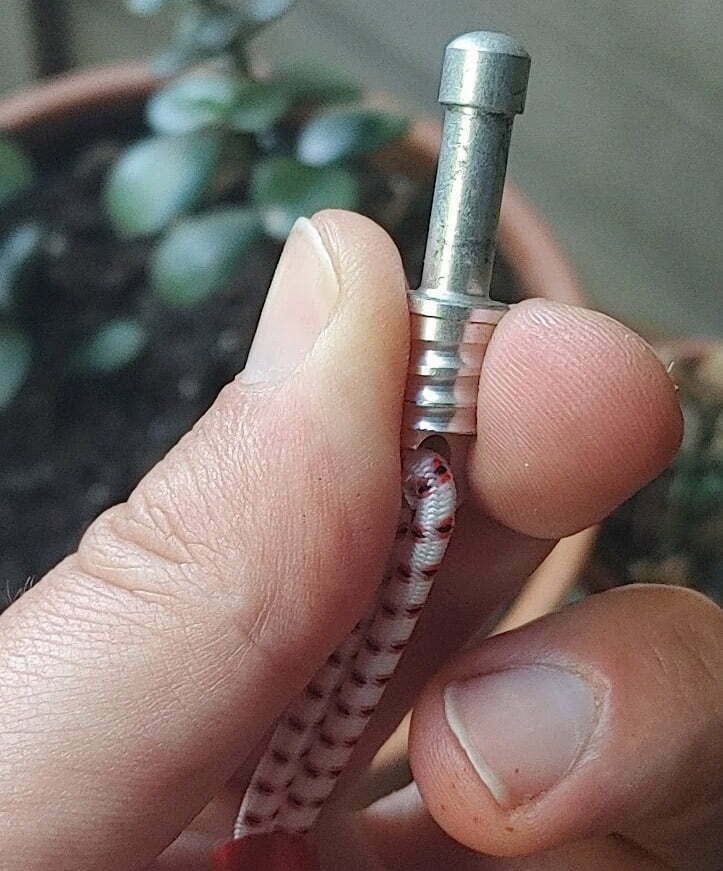
At the final pole segment, tie a loop in the cord and attach it to the clip/pole end. The factory knot from MSR is a slip-prone overhand bight. These knots don’t take a lot of “pull” tension so I imagine that must be okay, but I tied a bowline on anyway. It seems fine, it’s no thicker, and it went in the pole great. Your mileage may vary. Tighten your knot as hard as practical to make it small enough to comfortably enter the pole.
-
Insert the tip/clip in its segment/hub. Don’t be afraid to give the cord a tug from the far side to get the knot through, but it shouldn’t require much force. If it does, go back and rethink your knot.
-
With this done, return to the other end of the pole, where the cord is still hanging loose.
-
Remove the furthest pole segment on that end. When my spool of cord was too long, I cut it right at the end of the pole segment then slipped the segment off; this cost me a few inches in waste material. Most people cut the new cord to the length of the old cold then trim the excess, but if your old cord is badly stretched-out this could be a lot of waste.
-
With the final pole segment set aside, stretch the cord from the end of the second-last pole segment a certain amount, then clamp it off at the end of the segment, so the cord within the pole segments was under tension. MSR recommended a stretch of 0.35 × the total length of the pole. My spinal pole was eight feet (96 inches) when assembled, so I stretched the cord from the end of the second-last pole segment until the stretch was 96″ × 0.35 = 33.6″ long, then clamped it off at the end of the segment. Sixteenths of an inch do not count here; a tape measure on the ground at the right length, a stretch, a clamp, don’t worry too much, and you’re close enough. If you’re too long by a bit you can fix it later. Melt the cut ends of your cord with a cigarette lighter to prevent fraying.
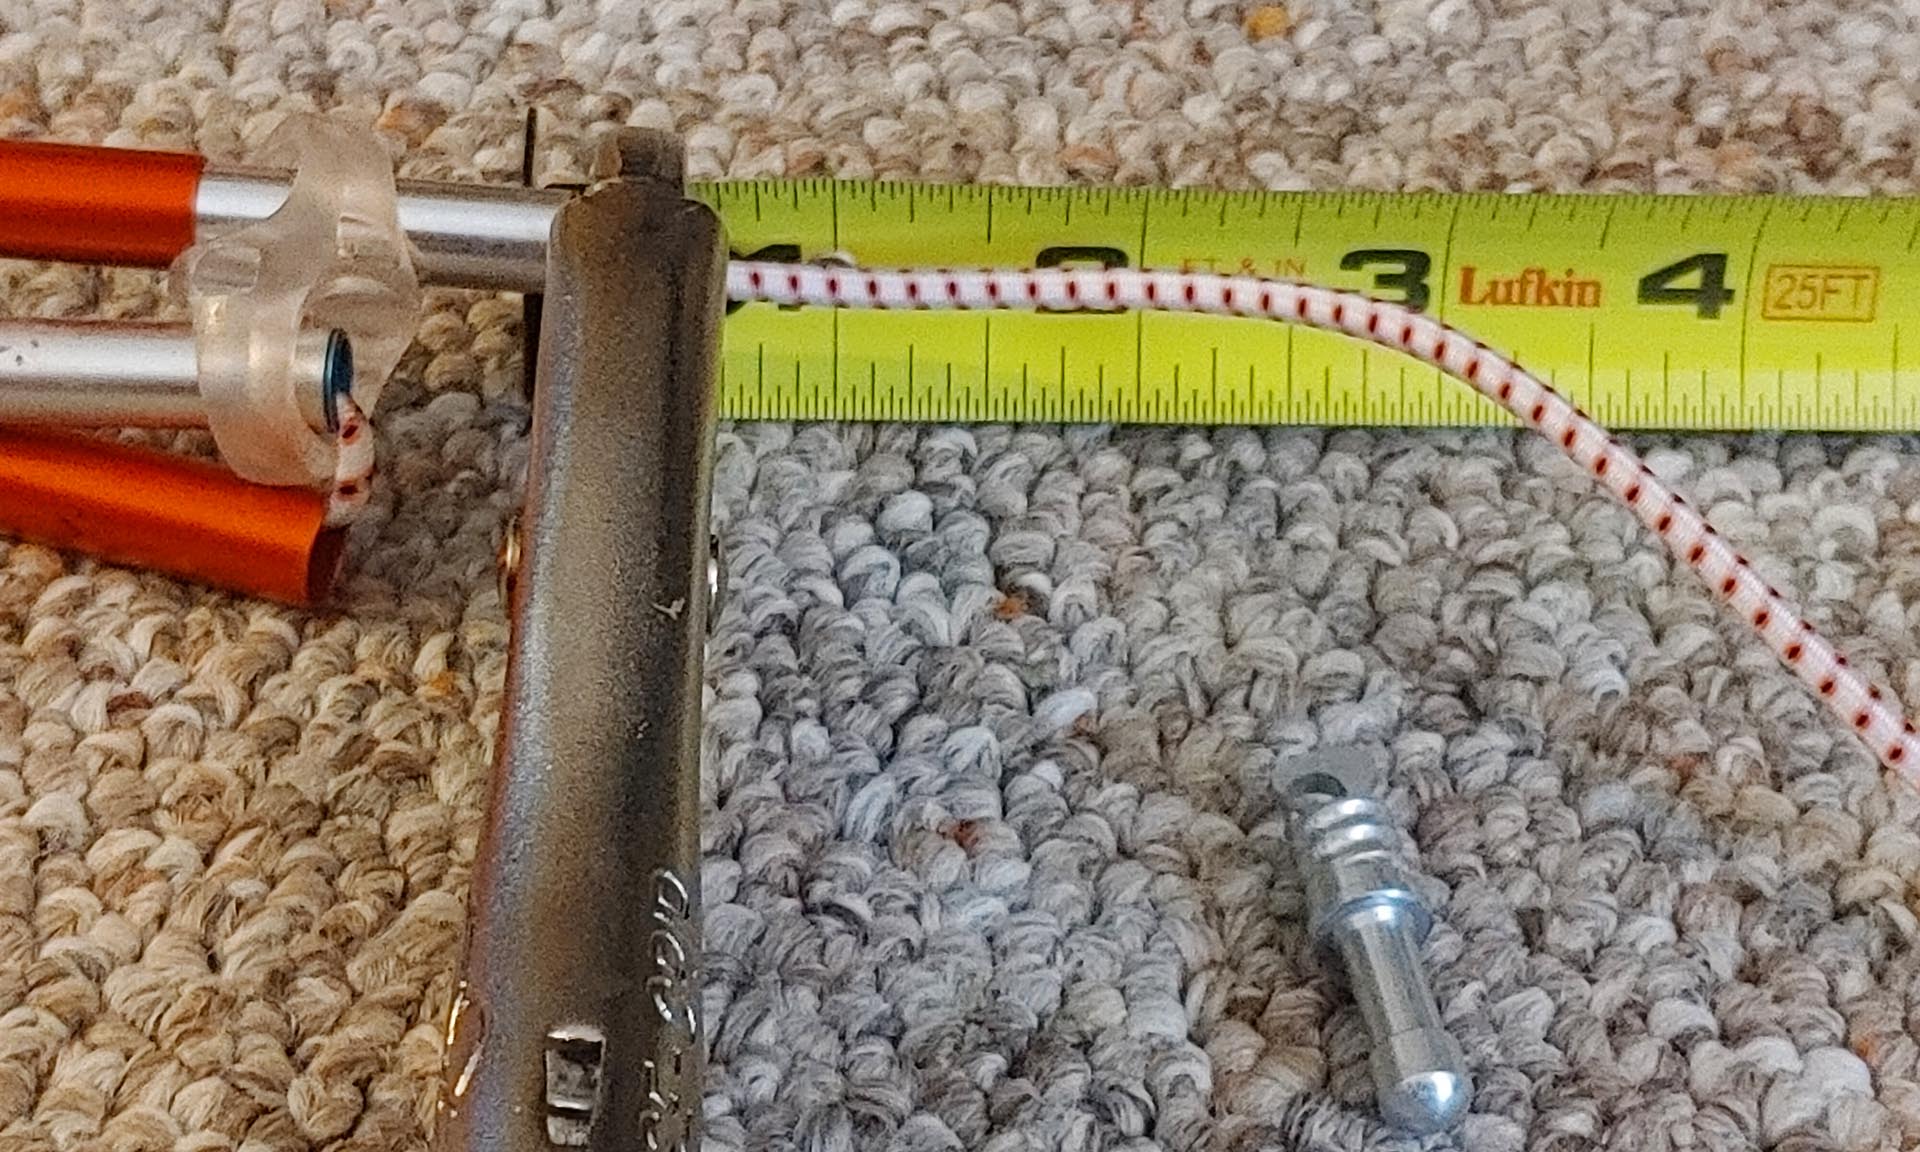
-
Place the final pole segment over the cord, and snuggle it up to your clamp.
-
Trim any excess, and melt the ends of the cord again.
-
Tie a loop into the cord and attach it to the other tip/clip. Again, keep the knot good and tight so it passes into the pole easily.
-
Remove your clamp.
-
Wiggle the tip/clip into place, screwing in if necessary.
-
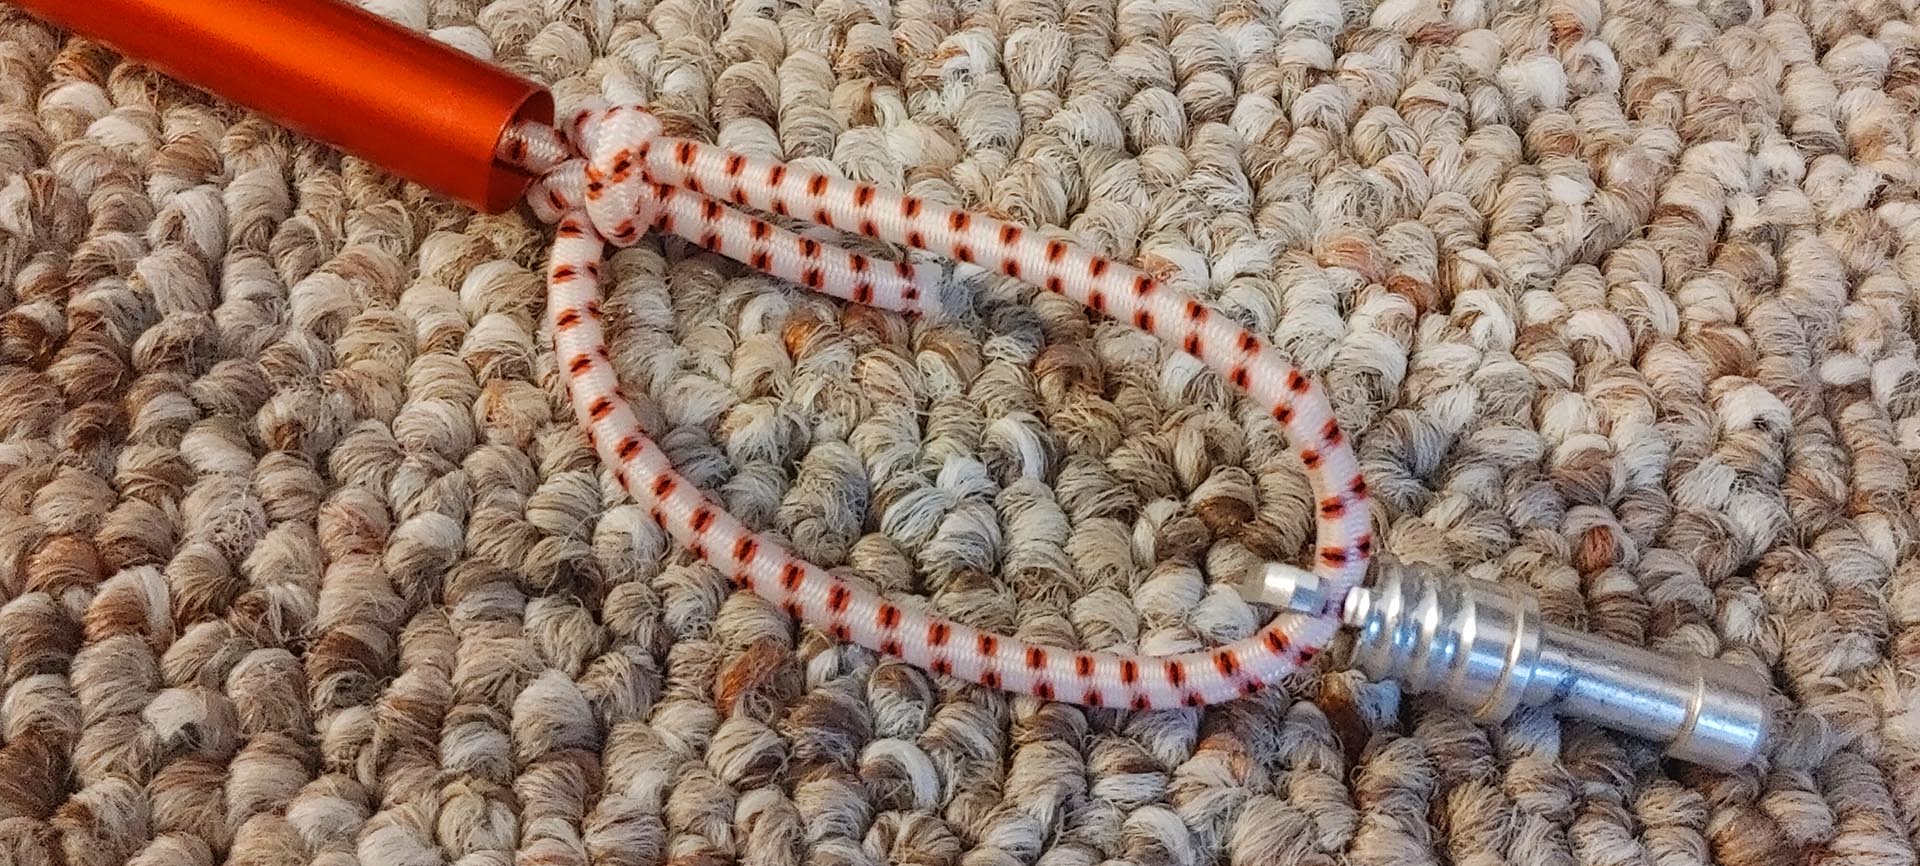
Test assemble and disassemble your poles. Feel the satisfying snap of fresh elasticity. If it feels too slack, remove a clip, untie your knot, add more tension to the cord, tie it again, and cut/seal your excess. Err on the side of “a bit too long.” It’s easier to remove cord later than to add it.
If you’ve taken your tent out enough to have this problem, there’s probably a feel to your poles that you know well. Remember when the tent was brand new and it felt like you could just shake your poles out of the bag and they’d snap into place? That’s the feeling you’re trying to get back. But this doesn’t take great precision. Given a rough guide for how much cord you need, it’s easy to make it feel pretty good. Your calibration tools are your hands and your eye.
This is an easy job once you’ve got your eye in, and it’s tremendously reassuring to know how your poles come apart and go back together in the field. I highly recommend you don’t put off this simple task.

Thank you, this was more than helpful!
This helped me so much more than any other video or tutorial I could find! Thank you for making this make sense for me!